Are you looking to step up your online business by adding an e-commerce store on your WordPress website? If so, you’ve come to the right place.
Adding an online store to a WordPress-powered website is easy; it’s only a matter of installing the right plugins and then customizing the looks.
This article will guide you through the process of installing and setting up an e-commerce store on your site with the help of a plugin called WooCommerce.
Note: WooCommerce can be installed only on WordPress sites.
Installing WooCommerce plugin
Just like every other plugin on WordPress, you can install the WooCommerce plugin by navigating to your WP dashboard and then clicking on Plugins -> Add New.
Search for WooCommerce plugin with the help of the search field, and then click the ‘Install Now’ option next to the plugin developed by WooThemes. Click the ‘Activate’ option once the installation is complete.
You will now be welcomed by WooCommerce’s setup wizard that will teach you everything from setting up relevant pages to taking care of shipping and payments for your online store. The setup window will take you through the following steps to get your online store up and running in no time.
Relevant store pages
The very first step when it comes to setting up an online store is creating pages that are crucial to ensure a seamless user experience.
The ‘Page Setup’ option in the setup wizard lets you easily configure these pages in no time. And that includes the ‘Shop’ page that lists all your products, the ‘Cart’ page that displays the products a user added to their cart, the ‘Checkout’ page that lets a user pay for the items, and the ‘My Account’ page to display info about the user.
A little bit about your business
After you’ve finished setting up pages, it is time to configure ‘Store Locale’ settings. Under this setup, you will need to provide information like the location of your store, currency, and the preferred units for measuring weights and dimensions of a product.
Shipping and Tax info
The setup wizard now takes you to the boring part — adding information about shipping and tax. Fortunately, though, WooCommerce has put in a lot of effort in toning down the complicated stuff, and all you need to do is check the boxes that apply to your business model.
Under the ‘Shipping & Tax’ module, you will come across questions such as “Will you be shipping products?”, “Will you be charging sales tax?”, etc.
Configuring payment gateway
WooCommerce offers plenty of free, safe, and secure payment gateway options, including PayPal and Stripe, for your online store. Alternatively, you can also partner with North American Bancard (NAB) to get free access to their eight different payment gateways, including Authorize.net and USAePay; more info on NAB gateway is available on their official website, https://www.northamericanbancard.com/.
Click ‘Continue’ to close the wizard so that you can start adding products to the store.
Adding your products
Now that you’ve completed setting up the virtual store, it is time to start adding products or services you’re going to sell to your audience. To get started, go to the WP dashboard and then select WooCommerce -> Products -> Add Product.
You will be taken to a WordPress editor that lets you add the following properties for a product:
- Name
- Description
- Product Data – Physical/Virtual/Downloadable
- Short description
- Categories
- Tags
- Featured image
- Gallery
Product categories are not just important in terms of SEO, but also they contribute immensely to providing a great user experience for your customers. Take heatline.com for instance, their wide-portfolio of products are categorized into different categories based on their application, and that includes Retro-Line, Retro-DWS, Retro-FM, CARAPACE Factory Terminated, CARAPACE Field Terminated, etc.
Click on ‘Publish’ when you are done adding information about the product.
Tips to increase sales
Now that you’ve built an online store for your business and added the very first product, it’s time to look into how you can convert traffic to sales.
There are many different ways to achieve this, but a cost-effective strategy would be offering impressive discounts to website visitors.
Offer exclusive promo codes to visitors who can then use them to buy your products or services at a discounted rate.
Instead of running expensive marketing campaigns, you can let existing users know about the deals through a simple banner on the sidebar of the website or use a plugin like Advanced Ads to insert it in the middle of articles.
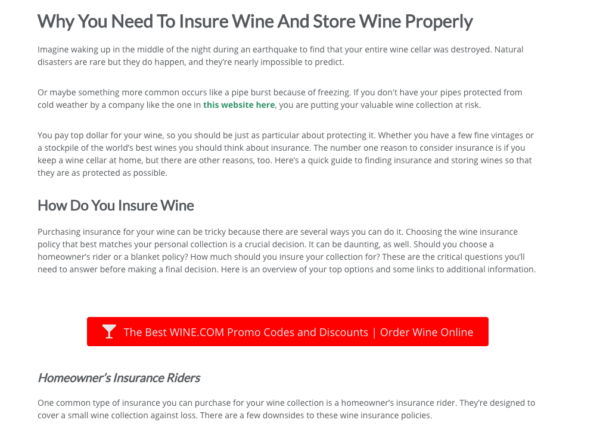
For instance, check out how California Winery Advisor increases their conversion rate by adding a simple CTA button for promo codes in the middle of this article: https://californiawineryadvisor.com/the-best-way-to-store-insure-wine/

If you’re selling a physical product, do a video review and insert it on the said product’s page so that users can have an idea of what to expect.
Keep in mind, there is no better testament to the quality of products or services you are providing than honest positive reviews from existing customers.
So, always ask your customers to leave feedback about the purchase.
Numerous positive reviews can serve as a final push for those folks on the fence to give the product a go.
Conclusion
WooCommerce is the easiest way to start an online store on your WordPress website, and the best part is — it’s absolutely free. With the help of the WooCommerce plugin, you can have your e-commerce store up and running in a matter of minutes. It is very beginner-friendly and doesn’t require you to versed in technical know-how to get started. You can also easily customize the looks of your store by installing a different theme from WooCommerce Marketplace, although the default one called Storefront — a simple mobile-friendly theme — should be more than enough if you’re just starting out.